Saturday, April 16, 2011

IFLC Macro Photography Week 2 - Day 7

I noticed today that my favorite subject changed shape again. I decided to practice a bit again today on this subject. I had to use flash again since the lighting is so bad in the room where I'm shooting. I will get back to the program and practice using the ideas from the lesson plan again next week. Also today I finally received a new purchase. I bought an SC-28 cable to pull the flash off my camera and not have to worry about line of sight when using the commander mode on my D90.

I definitely don't like the lighting on this shot. It shows a bit wider angle the change that took place from last night. I should have taken one more shot with the light in a different position, but I wanted to try out the extension tubes on my macro to see what would happen. 1/200s - f/40 - ISO 200
Week 2 - Day 7: Shot 1

I added all three Kenko extension tubes for an added 68mm to my 105mm macro lens. I slightly bumped the clarity and saturation in the camera. This shot really showcases the details coming out of this plant. 1/200s - f/40 - ISO 200
Week 2 - Day 7: Shot 2

I kept the tubes on for this shot and slightly backed off the minimum focus in an effort to show the entire base. Unfortunately trying to hold the flash in one hand and trying to steady the camera with the 105mm lens and the tubes in the other hand isn't the easiest task in the world. It takes time to try find the correct focus (which is very difficult in a room that is under lit) and it was difficult to remain steady. So I missed the composition that I was shooting for, but this shot still shows some nice details. 1/200s - f/51 - ISO 200
Week 2 - Day 7: Shot 3

Friday, April 15, 2011

IFLC Macro Photography Week 2 - Day 2 - 6

Unfortunately I did not have much time for shooting and even less time for posting this week. Due to a variety of things, I was only able to have a minute or two here and there. I did have some time one night and tried to do the last "lesson" at the end of Volume One, but the creative juices just weren't flowing and I didn't like what I was creating. I decided to turn that into some learning as I added extension tubes to my 105 mm macro lens to see how much closer I could get. Most of the shots below were not working on anything specific. I was just practicing. I also discovered that lightroom was causing me to lose the in camera changes I was making to the pictures since I was shooting in RAW and JPG. I'm not really doing any processing of the photos right now since I don't have any time and since I'm still trying to learn the subtle and less subtle nuances to macro shooting. So I turned off the RAW shots for now and just shot these as JPGs.

I'm doing an experiment. When I post a link to this on facebook, it shows my first shot. I'd like my last shot in the set to be the image that is chosen. So I'm adding it here in hopes this is the images that shows. You'll need to read on get the details on this shot.
Week 2 - Day 2: Shot 13

I shot this at ISO 500 and kept my shutter speed at a minimum of 1/200 sec as I was in the shade and was trying to get most of the dead bud in focus using f/14. Excluding composition issues (as is pretty much the case in all my shots; I obviously need to work on that), this was a promising shot. Unfortunately I missed the focus a bit. There are some issues as well that I think some extra light would have resolved. I hope to start spending more time paying attention to light so I can start working on these issues.
Week 2 - Day 2: Shot 1

I quickly moved over to a live flower and took a shot of the thorny stem to identify the texture. The lighting was similar so I stayed at ISO 500, 1/200s and f/14. I got what I was aiming to get, but the more I took at this shot, the less I like it.
Week 2 - Day 2: Shot 2

This is another one that isn't very exciting. I like where I was headed, but missed the focus a bit and the depth of field was a bit too shallow. 1/400s - f/10 - ISO 500
Week 2 - Day 2: Shot 3

Here is one of my shots I tried to create using the tabletop studio and shooting board games. I couldn't really get anything to work as my mind was not working from lack of sleep. I needed a deeper depth of field to deliver the message I was going for and the white balance was off. I was a bit limited since I still wasn't using the flash. I had to shoot this at 1/200s - f/13 and ISO 800.
Week 2 - Day 2: Shot 4

I decided to move to something a bit more technical and less creative. I started adding some of my Kenko extension tubes to my 105mm macro lens to see how much closer I could get. I shot a dollar bill using my tabletop studio.
This first shot which was a good demonstration of planing was done with my 105mm lens at its closest focusing distance.
Week 2 - Day 2: Shot 5

I then tacked on the 36mm extension tube and moved a bit more towards parallel to get a bit more in focus. This definitely got me closer.
Week 2 - Day 2: Shot 6

I then added the 20mm tube to my lens and 36mm stack. I had to slightly bump the ISO to 250 to keep the exposure up.
Week 2 - Day 2: Shot 7

And finally I added the 12mm tube to the stack. So this was the 105mm lens plus 68mm of extension tubes. Nice and close. I may need to try some of this outside to really get in close to some of my shots.
Week 2 - Day 2: Shot 8

Later in the week I took this shot of rose just starting to bloom. I liked the thorning texture of the outer skin here. I think the shallower depth of field really worked here. I like this shot. 1/250s - f/6.3 - ISO 400
Week 2 - Day 2: Shot 9

My goal here was to focus on the middle and let the rest blur away. The wind was a blowing a bit so I had a bit of a difficult time getting the composition where I was aiming although it's pretty closer. I would have like a bit more light inside to really show the details in the middle. 1/200s - f/16 - ISO 200
Week 2 - Day 2: Shot 10

I then moved over to a flower that was more in the sun. It turns out, this isn't a very exciting shot. I should have done a different composition. 1/320s - f/10 - ISO 200
Week 2 - Day 2: Shot 11

Now for the exciting shot. I moved back to my favorite indoor plant. These buds from last week are starting to bloom. I made a very similar shot a couple years ago using photoshop and stitching a bunch shots together to get the depth of field I was going for. I know slightly more now then I did back then and decided to try add a flash to see what I could make. The details in this shot are sharper than the stack I had last time and I didn't use a tripod this time either. I guess it really goes to show that technique and knowledge can take you a long way. The exciting things is that I'm just starting to learn. Anyway, I had the flash off the camera sitting on a shelf over my right shoulder. My goal here was to highlight the droplets on the side while bring out the details of what is on the inside. I closed my aperture all the way down to f/32 to bring in a lot of details and to darken the background. I bumped up the sharpening, contrast and the saturation in the camera as well.
1/200s - f/32 - ISO 200
Week 2 - Day 2: Shot 12

Since I am only starting on flash (I hope to get a lot more of the basics this weekend in our 3rd class) I decided to move it a bit in order to see what that would get me. I moved the flash slightly higher and pointed it down. Obviously this is a very similar shot, but the shadows are slightly different.
Week 2 - Day 2: Shot 13

Even though I didn't have much time this week and didn't get in nearly as much practice as I would have liked, I still got a couple good shots and spent a bit more time playing with the in camera settings. I still need a lot more practice and experience.

Sunday, April 10, 2011

IFLC Macro Photography Week 2 - Day 1

Today the IFLC macro group met at Balboa Park again for our 2nd class on macro photography. We explored shooting with a deeper depth of field and different camera settings that allow us to bring out more detail and color in our shots. I have a feeling I'm losing some of that when I bring them into Lightroom. I think in shot I export to flickr is losing something from the shot coming out of the camera. I need to do some testing and I may need to remove lightroom from my workflow for a little while. Since we were allowed to shooting with a deeper focus, we can now start getting some of our shots more into focus and get more exciting shots. Out in the bright daylight today it was easier to stop way down for the deeper focus, but I will be struggling this throughout the week with my limited light. Next week we will introduce flash into our shots. I think that will make a huge difference. I'll be able to stop as much as I need and really get some close up and in focus shots. Enough with the intro. Here are some of my shots for today.

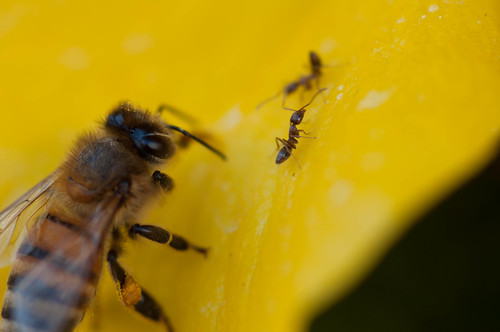
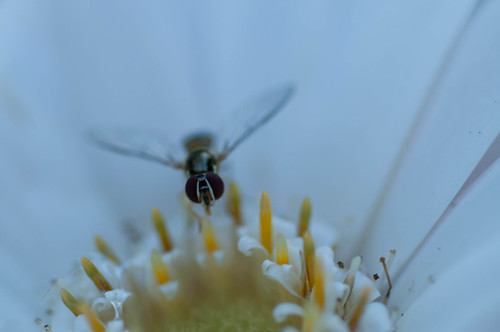
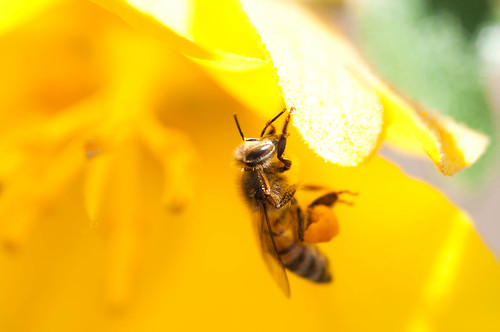
I got there a bit early and took a few fun shots. There were some ants and bees on some flowers and I worked to get them in focus. At f/8, my depth of field was still to narrow to get everything in focus, but this one with showed and ant and the top of the bee. Pretty cool.
Week 2 - Day 1: Shot 1

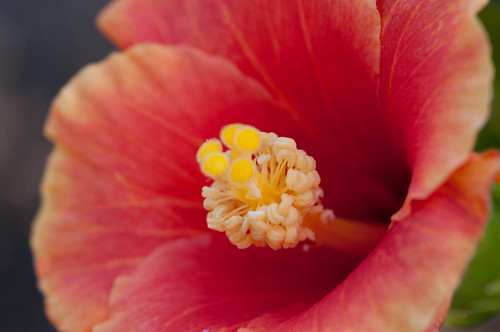
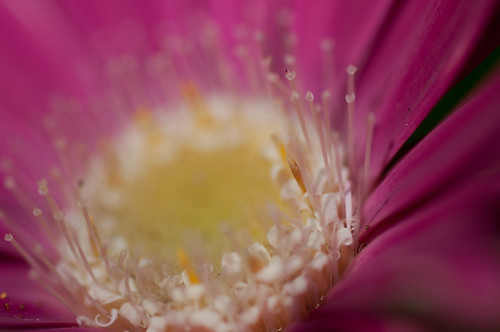
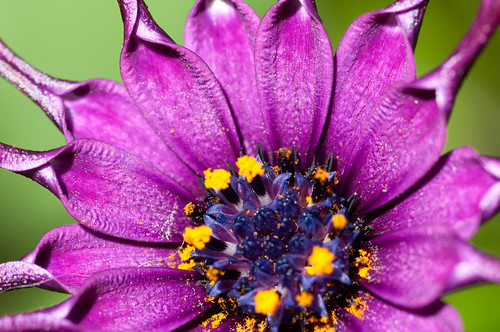
I backed out a bit on this shot and didn't do a 1:1 shot. I this it down to f/10 and was really able to pull out the details in the middle of the flower.
Week 2 - Day 1: Shot 2

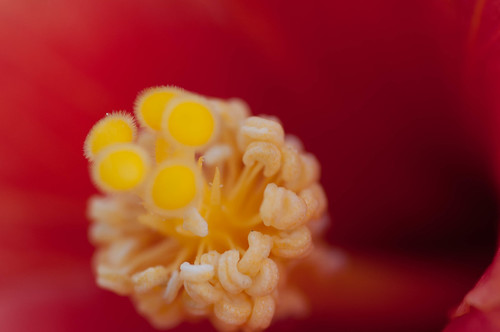
Here I moved back in for the 1:1 shot and really focused in the middle. Again, I could've definitely gone more. Maybe f/16 or f/20 would have nailed the shot.
Week 2 - Day 1: Shot 3

We started class today and we were to explore different apertures to see how they affected the shots. To keep proper exposure and with keeping the shutter speed in the safe zone we needed to start bumping our ISO. I actually picked up a key item here that I think was 1 of a few reasons I had been missing my focus. I had been trying to keep my 105mm lens no slower the 1/100 second, but we were told to at least double the focal length. So today was aiming to keep it at least at 1/200 second. That was helpful and I think this will help me moving forward. Anyway, the goal here was to start at the widest aperture and in increments go down to the narrowest aperture that supported the maximum ISO available for the camera. This shot was f/5 and ISO 200. I was lucky enough to have this bug show in all the shot for this sequence. Wide open, some items are in focus, but not much.
Week 2 - Day 1: Shot 4

I then moved to f/8 and needed to bump the ISO up to 500. I got a wider depth of field and got more in focus.
Week 2 - Day 1: Shot 5

Next was f/16 and ISO was all the way up to 2000. I'm surprised here that the noise was not bad at all. I expected garage with the ISO this high. Instead, I got a very nice looking shot. The bug is nearly completely in focus and most the details inside the flower are in focus. Cool!
Week 2 - Day 1: Shot 6

Then I went all the was to 3200 ISO which the max my camera can handl. I was able to get down to f/20. Definitely have some noise coming into play, but this is promising for options throughout the week when I'll need to bump up the ISO to get more depth of field.
Week 2 - Day 1: Shot 7

I decided to try the practice again with just a flower and no bug. This flower was a bit more in the sun ultimately giving the option for a smaller aperture. The first shot here is f/5 again and ISO was 200.
Week 2 - Day 1: Shot 8

Again I move to f/8, but was able to keep the ISO at 200. I missed my focus a bit here. You can see the petals in the front of the shot are getting more in focus. I was aiming to get more of the middle of the flower in focus.
Week 2 - Day 1: Shot 9

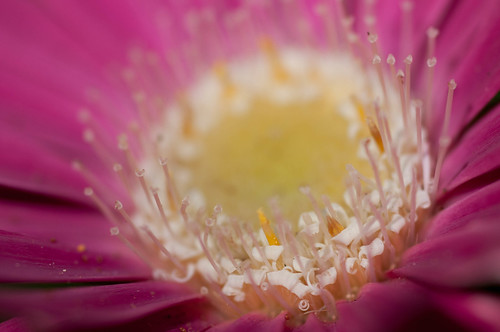
Now I close down to f/16 and only had to nudge the ISO up to 320. There is a similar problem that the last shot had where the focus moved slightly forward instead of back.
Week 2 - Day 1: Shot 10

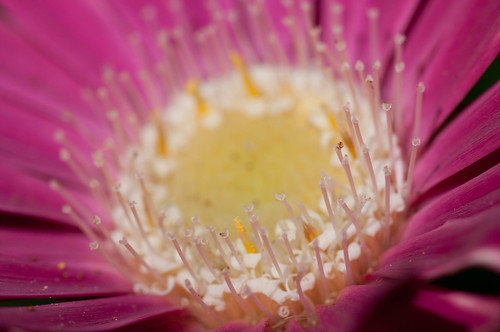
At the max 3200 ISO, I was able to get down to f/51 and got most of the flower in focus. You can see some pretty amazing detail without tons of adding grain at the really high ISO.
Week 2 - Day 1: Shot 11

Here we started playing with the clarity settings in the camera. Here is where I need to practice and test at home to see if lightroom is changing my shots. I though this shot was the minimal clarity setting, but it might have been the middle setting.
Week 2 - Day 1: Shot 12

And here I moved to the max clarity setting. Definitely a difference, but not huge.
Week 2 - Day 1: Shot 13

I believe this was the max saturation setting, but I'm doubtful as it's not too different from the other shots.
Week 2 - Day 1: Shot 14

Same thoughts as the last shot except with the min saturation settings.
Week 2 - Day 1: Shot 15

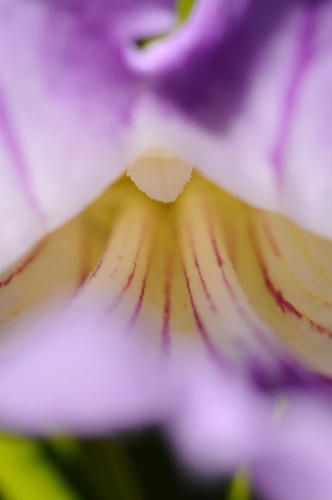
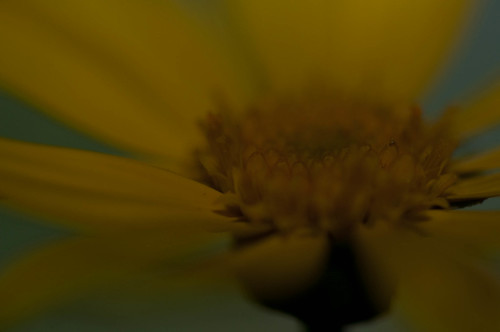
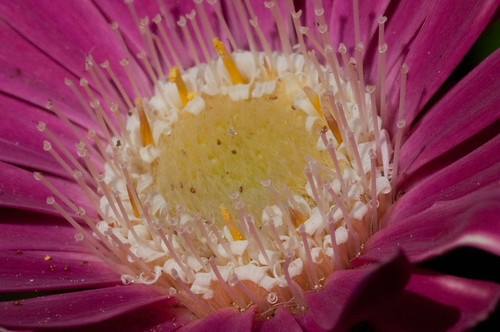
This was just a very cool flower. I shot it at f/16 and ISO 500. Before seeing these on the computer, I was worried with my ISO settings and tried to only get by with the minimum. Maybe f/20 or f/24 would have gotten the focus all the from the tips of the center to the back outer edges. I missed the extremes. Kind of a cool shot though.
Week 2 - Day 1: Shot 16

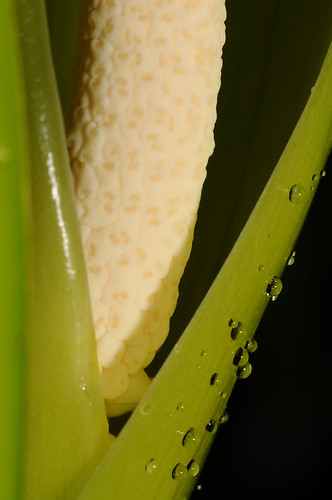
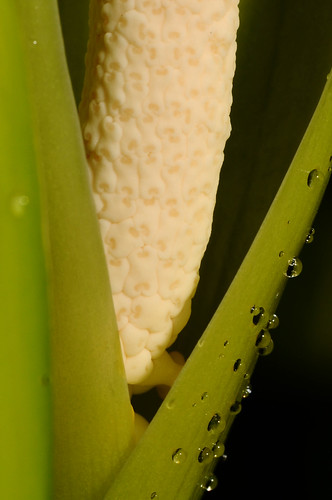
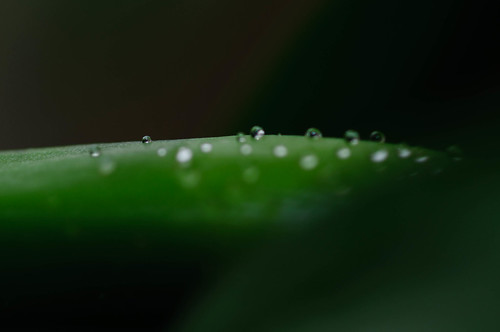
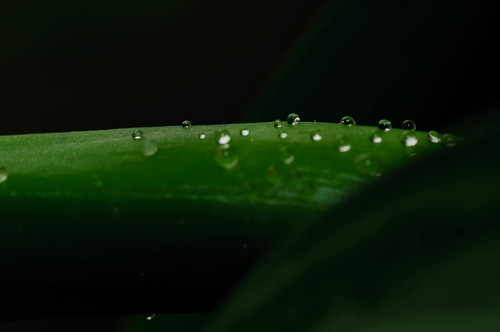
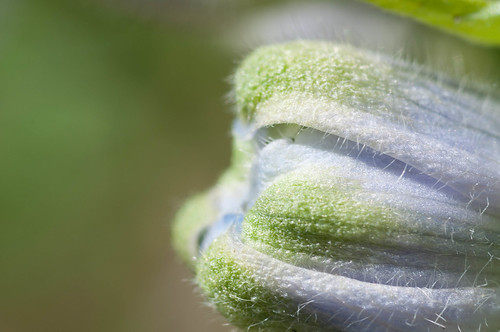
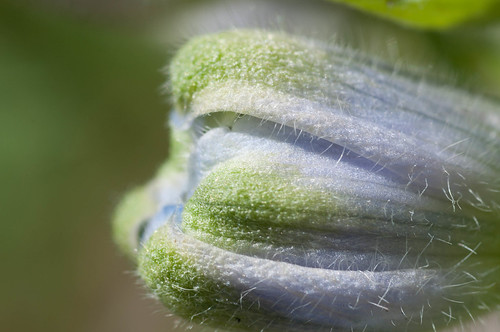
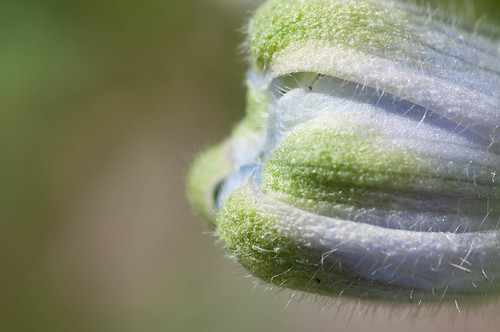
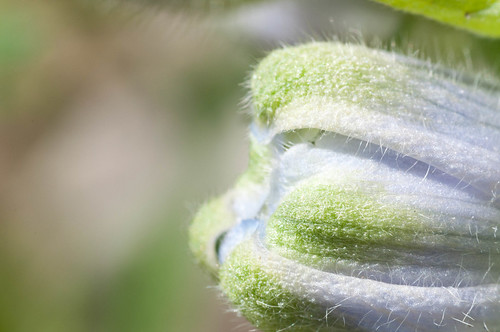
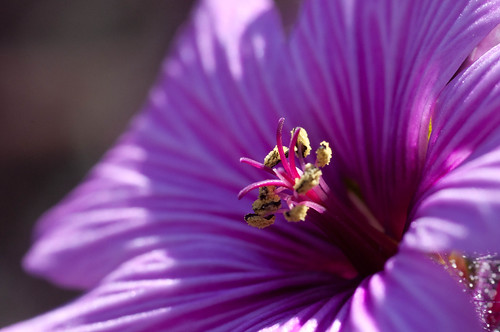
We moved over to these flower to work on texture, color and curves. I wanted to focus on the texture in the middle of this flower. f/18 worked well here to focus in on the center and slightly blur the front and back of the shot.
Week 2 - Day 1: Shot 17

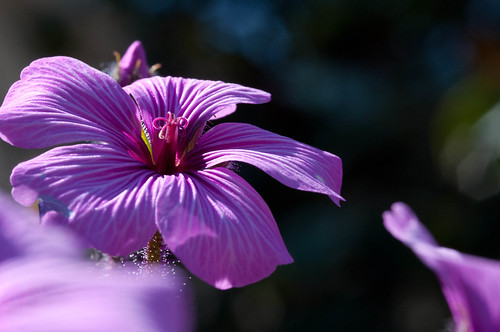
Same flower but closed down to f/20. You can a glimps here of the details in the stem. Awesome flowers. I like the contrast of the dark green background.
Week 2 - Day 1: Shot 18

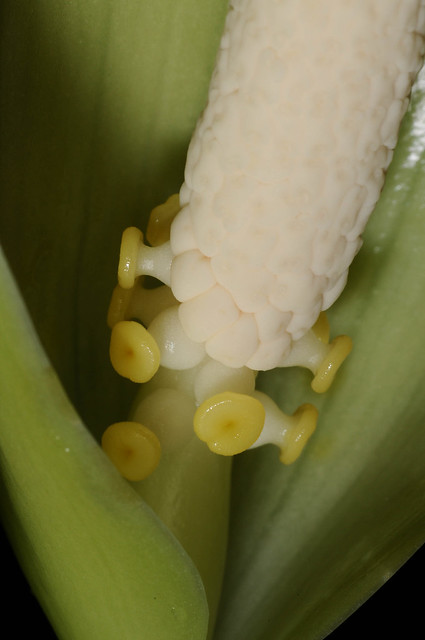
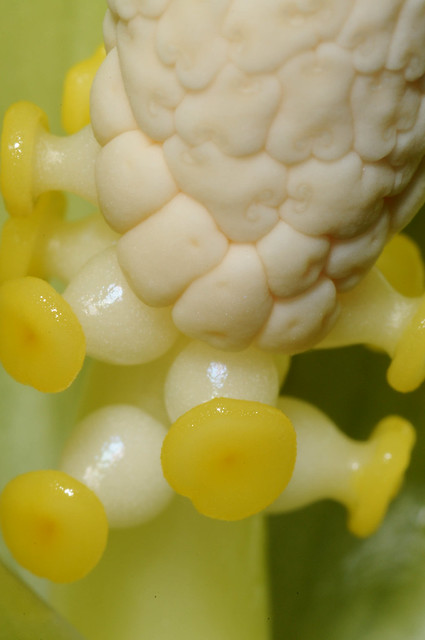
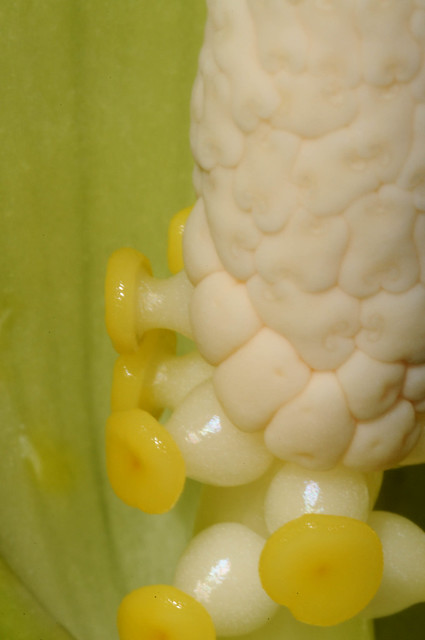
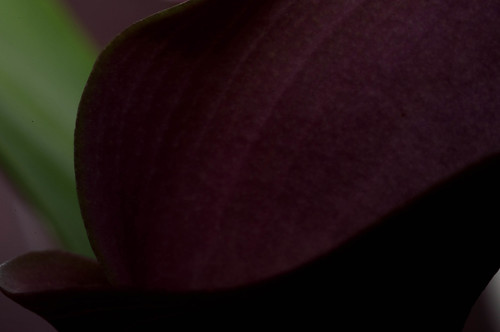
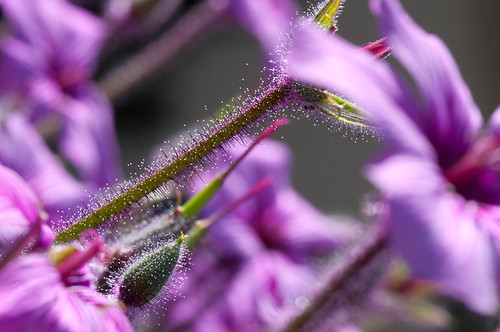
Here's a good glimpse of the amazing details on these guys.
Week 2 - Day 1: Shot 19

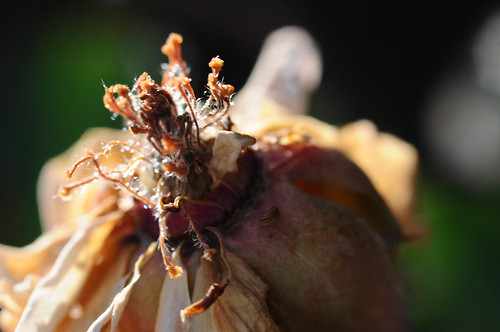
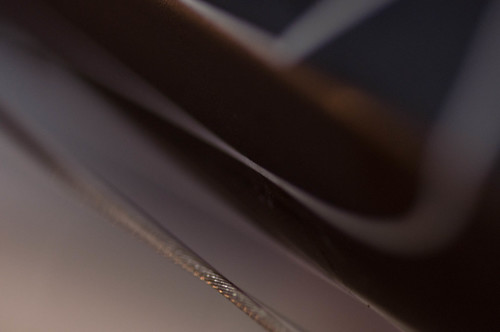
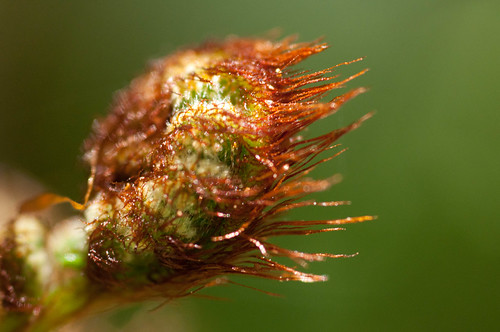
In the botanical garden, I see this "thing" on a tree I think. Unfortunately, I only shot it at f/8. I had my ISO all the way up at 1250 for this shot. So a flash really would have come in handy. I would have liked to get more of this in focus and a slight increase in the clarity could have brought out more details too. With that said, the details that are in focus along with the buttery background are pretty cool.
Week 2 - Day 1: Shot 20

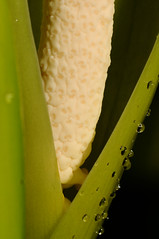
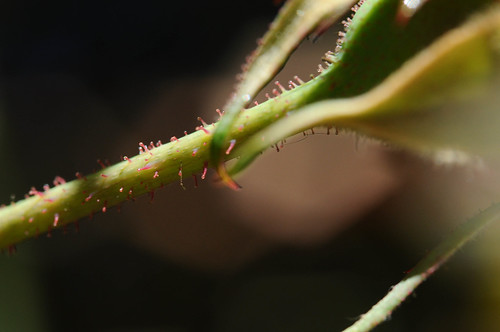
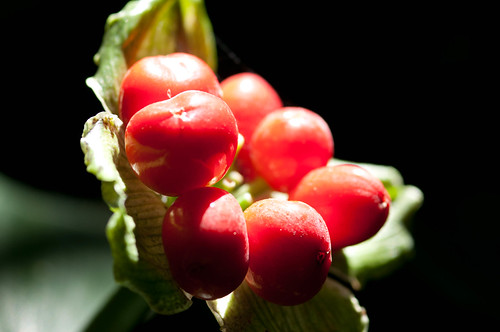
There was a sliver of light coming in illuminating these guys. Exposing for the bright light help really dissolve the background. Again, I should have closed down the aperture more here to get more detail in the shot. At ISO 200 I had the opportunity this time.
Week 2 - Day 1: Shot 21

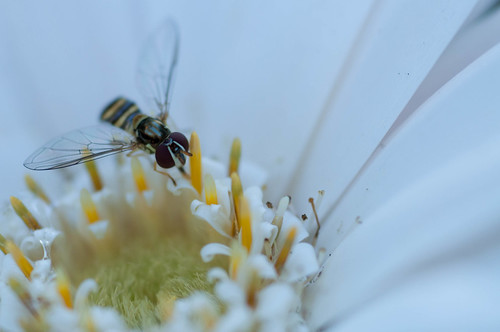
On the way out I stopped by the same flowers again and got another bee shot.
Week 2 - Day 1: Shot 22

This was a fun day. I can really start to see some exciting shots show themselves. It will be fun this week to play with some deeper depth of field to see what I can get. Depending on the light, I may add some extension tubes to my macro lens to take some super macro shots. It was also a good lesson today to see that the higher ISOs on my camera aren't as bad as I thought. I guess that means there are other problems with my indoor portrait shots of the family. Hopefully next week's flash discussion will have positive results on those shots as well.

Friday, April 8, 2011

IFLC Macro Photography Week 1 - Day 6

Tonight was time to put together a basic tabletop studio. It was just a couple desk lamps and some foam board. This allowed me to get some additional light into my shots. I'm still avoiding on and off camera flash for the practice shots for the class. The lamps definitely helped, but I could still use more. I was more stable for most of my shots and was able to use a slightly faster shutter speed tonight and that helped me get my shots a bit more in focus. All seven of these shots were taken using the tabletop studio.

Again I was using my macro lens for all my shots. I started at my minimum focus distance and had the aperture wide open. I was aiming for the focus inside the screw hole. So I slightly missed it, but essentially this is the shot I was going for.
Week 1 - Day 6: Shot 1

I moved to another section of the computer component and kept the camera settings the same. This time I hit my focus point and got the shot I was going for.
Week 1 - Day 6: Shot 2

I did try to use the on camera flash once. I closed the aperture down to f/18 and I took the same shot as last time. It was very underexposed, but has the potential for a cool shot.
Week 1 - Day 6: Shot 3

I went back to no flash and the widest aperture. I tried to come up with a cool shot with the golf ball and started with this one. I'm not a fan. I hit the focus, but it's just a boring shot.
Week 1 - Day 6: Shot 4

Keeping with the extremely narrow focus area, I ended with this shot. Now that I look at it, I would have preferred a slightly different composition. I guess the positive in this shot is that it shows the very narrow focus.
Week 1 - Day 6: Shot 5

For this shot, I turned the white foam over and used the navy blue background. I was aiming to get the entire cover in focus at the most narrow depth of field. I deleted one shot that missed the focus that I know was at f/5. I ended up closing down to f/8 for this shot. I'm not sure why since I was aiming for f/5.
Week 1 - Day 6: Shot 6

I tried the golf ball again with the darker background. I did close down to f/9 on this one because I wanted to get all of the Titleist in focus. Ideally I would have wanted to stop down even more to get the entire ball in focus, but that wasn't what I was practicing.
Week 1 - Day 6: Shot 7

It was cool to use the extra light provided by the lamps. It would be more helpful if they were stronger and if I had one more lamp. Most of the shots were pretty dull and I think using an off camera flash for some of them could have helped a bit.

Thursday, April 7, 2011

IFLC Week 1 Day 5

My goal for practicing for the macro class was to go through one booklet per week. I feel like I'm rushing a bit this first week, but thought I'd get through it just fine. I read ahead in the 2nd discovery book and realized that to really get as much out of this class as I can, I have to spend more than 1 week per booklet. I don't have nearly enough available time to spend practicing. Even though I will be done with the teaching part of the class in just over 2 weeks, I plan on continuing with the course structure until I'm done. With a lot of nights spent working, I don't know how long it will take. Obviously I have a lifetime to learn and take photos. There is no need to rush. With that said, instead of moving ahead tonight, I decided to spend a bit more time on some of the previous concepts for the week.

I know at this point, I'm not supposed to be using flash yet. I added the earlier in the night to take some shots of my daughter. There was a setting that was wrong that I couldn't figure out how to fix. So I reset it and was able to get full strength on my flash again. Because of that, I had to tackle my old friend again. I still don't fully know what I'm doing with the flash, but even the mostly auto settings I use helps. I took this shot with a very narrow f/4.2 getting only 1 droplet in focus.
Week 1 - Day 5: Shot 1

I then closed down to f/13 to get more of the droplets in focus.
Week 1 - Day 5: Shot 2

Keeping the flash on, I moved outside. It was nearly dark, but I wanted to see what I could do with the flash. Since it was so dark (and I'm not very good hitting my focus yet), I missed this shot.
Week 1 - Day 5: Shot 3

I moved to another flower using my widest aperture, I tried to shoot this flower a bit different than I had before. The shot looked brighter on the back of my camera than it does here. Had I see it was this dark I would've boosted my exposure a bit.
Week 1 - Day 5: Shot 4

This is the same shot, but I hit my focus a bit better as I was aiming for the middle.
Week 1 - Day 5: Shot 5

I then decided to stop using the flash and moved to the garage to shoot some stuff. I worked a bit on selective focus. I had to bump the ISO up to 800 to have a chance to get this shot. The shutter speed was still slower than I wanted at 1/50 second which is too slow for me. I tried to get the cable in focus and actually got it.
Week 1 - Day 5: Shot 6

Staying at my widest aperture I move on to the week lock to work on planing and paralleling. Here I was only able to get 1 tiny bit in focus.
Week 1 - Day 5: Shot 7

Moving more towards parallel, I was able to get more in focus
Week 1 - Day 5: Shot 8

I then did a bit more work on depth of field. I added an extra lamp and was able to get back down to ISO 200. I shot this wire brush wide open to only get the end of 1 bristle in focus.
Week 1 - Day 5: Shot 9

Stopping down to f/14, I had to bump the ISO back up to 800. This allowed me to get slightly more depth of field.
Week 1 - Day 5: Shot 10

For this last shot, I decided to try play a bit. I added the flash and closed down the aperture all the way to f/57. The room was a bit dark too. So it was difficult to find exactly where the perfect focus was. I thought the tiny aperture would help, but it looks slightly off. Obviously I needed more light.
Week 1 - Day 5: Shot 11

I'm realizing these shots I export from lightroom appear to be a bit darker than the jpgs that come out of the camera. I'm comparing what's on flickr to what I have on my computer and flickr is definitely a touch darker. I still seem to be off on a lot of the exposures, but this could be part of the reason for me thinking I'm closer. Even more interesting, after I posted this blog, I open it up just to make sure all the shots were there and I see that the images here are brighter than I currently see them on flickr. Very interesting. Maybe my shots haven't been quite as under exposed as I thought and they are closer to what I'm actually seeing when I review them on the camera. That would sure be helpful.